The Front 9
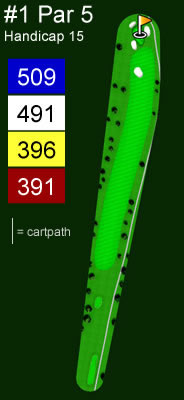
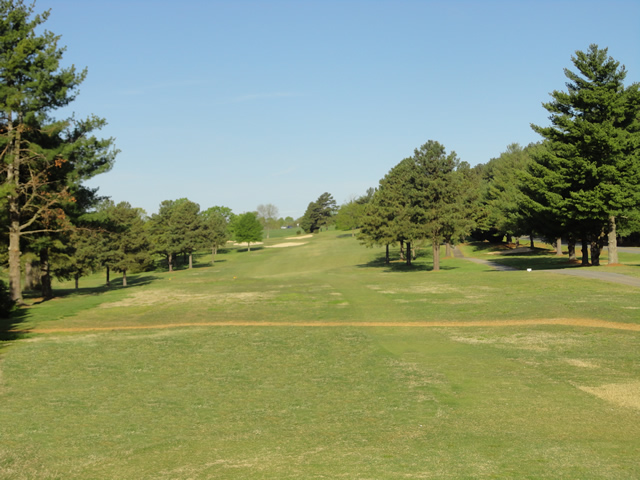
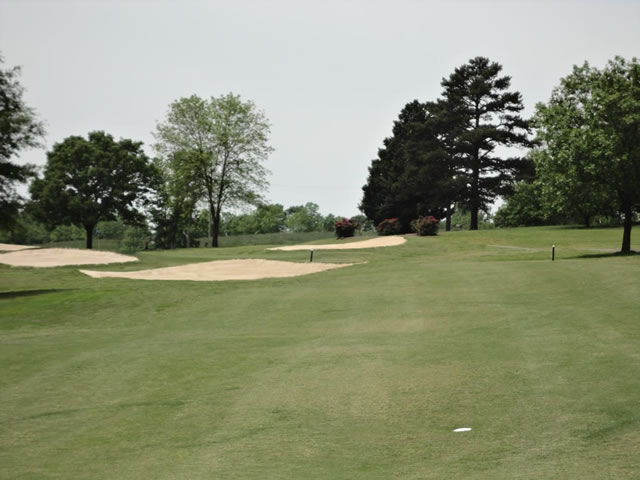
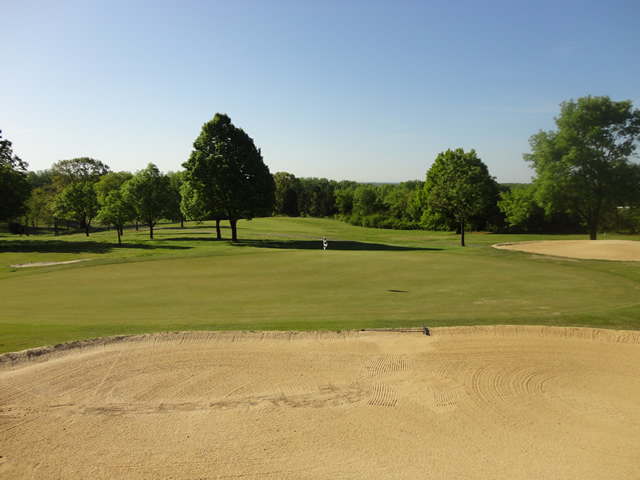
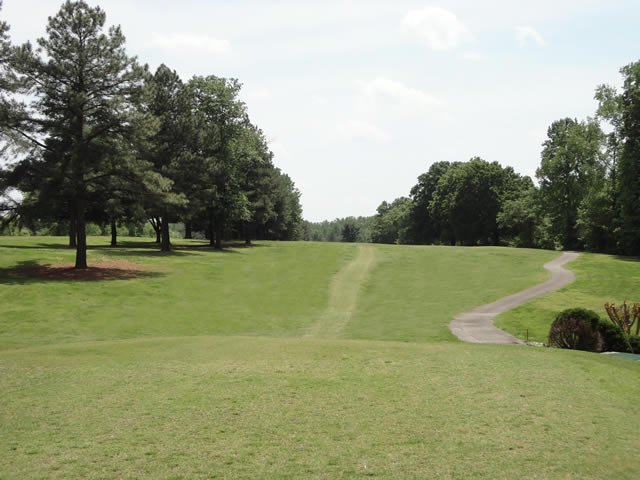
Hole #1
The first hole is a par 5 that requires an accurate tee shot with out of bounds to the right and a natural area to the left. There are three sand traps on each side of the green with an additional sand trap twenty yards short of the green that comes into play with your approach shot. A good starting hole to try and aggressively score on.
Click on the image below to view a larger version.
The Tee Shot
The Approach
The Green
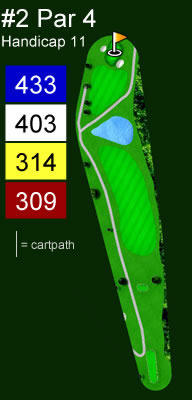
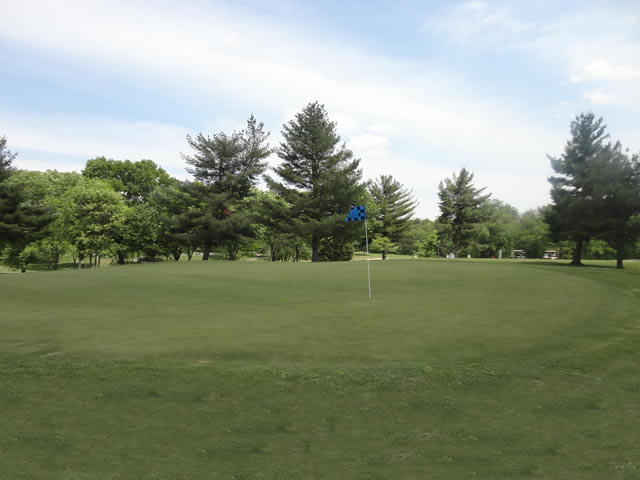
Hole #2
This par 4 has water that comes into play from the tee. Out of bounds to the right and a natural area to the left requires a straight tee shot down the middle. An approach shot over the water to a large green with sand traps flanking each side.
Click on the image below to view a larger version.
The Tee Shot
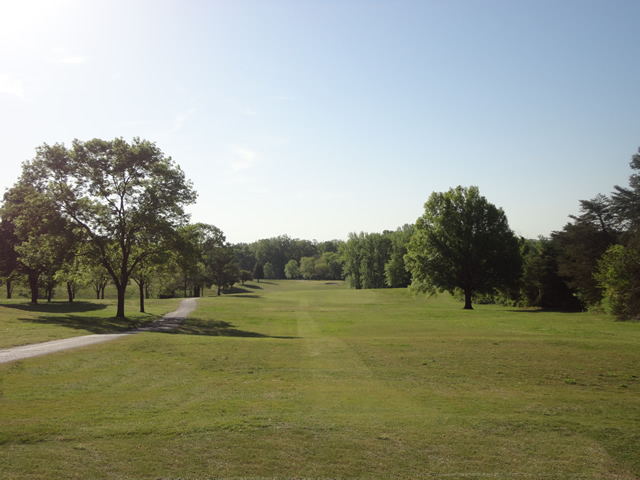
The Approach
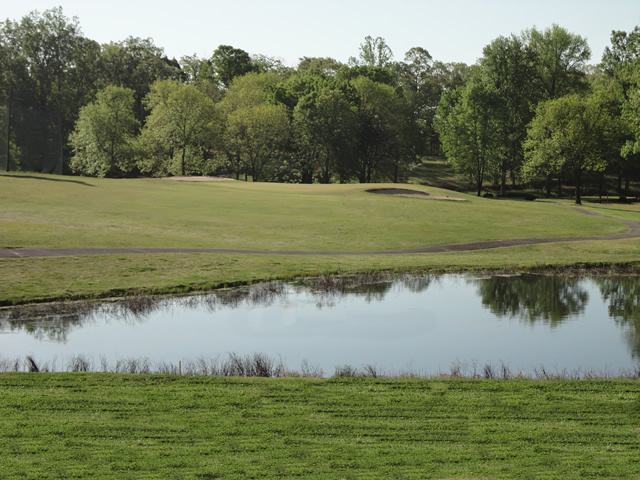
The Green
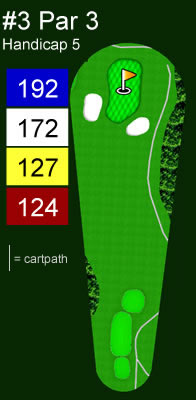
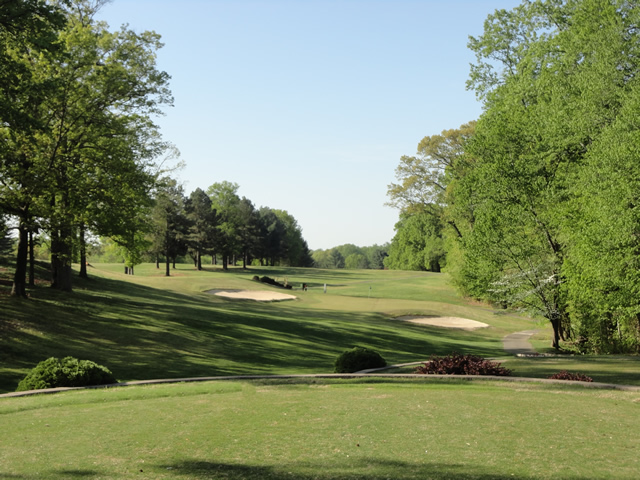
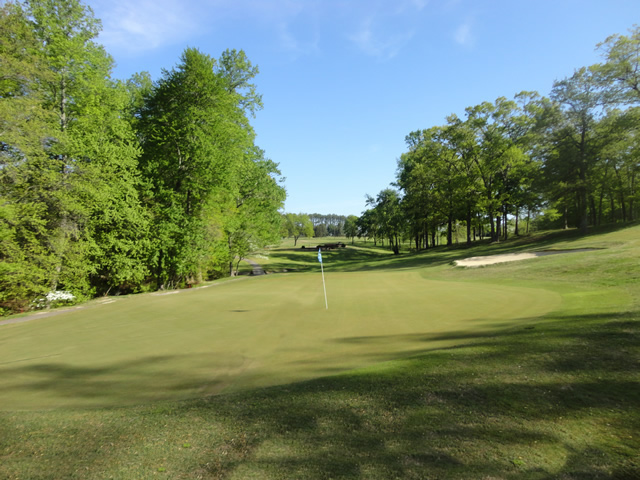
Hole #3
This sloping par 3 has a sand traps on the front right and left side of the long narrow green. A fun yet challenging hole.
Click on the image below to view a larger version.
The Tee Shot
The Green
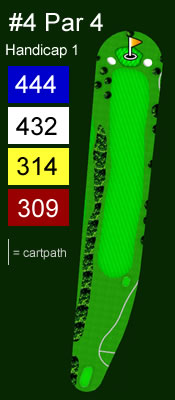
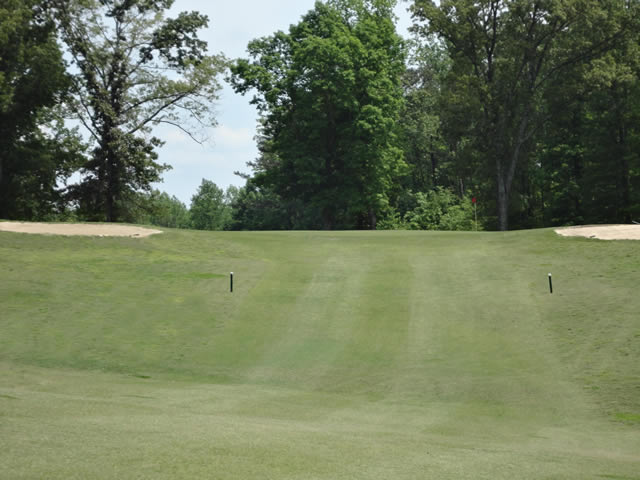
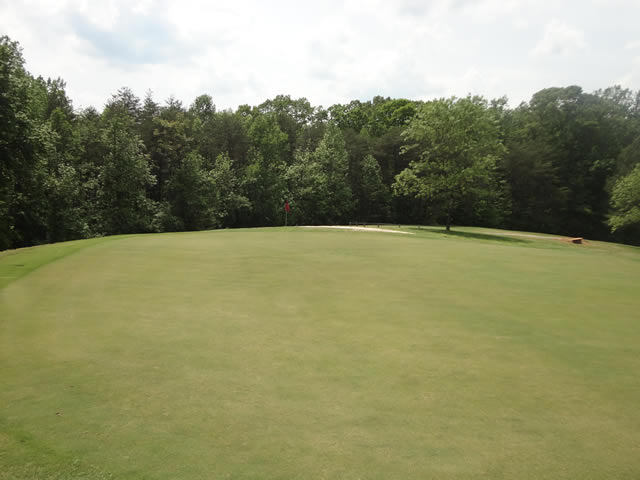
Hole #4
Our #1 handicap hole on the course is a very challenging par 4. The tree lined fairway with out of bounds to the right requires the most accurate tee shot of the day. With sand traps on both sides of one of the bigger greens on the course, this can be a hole that makes or breaks your round.
Click on the image below to view a larger version.
The Tee Shot
The Approach

The Green

Hole #5
One of our easier par 4’s, this can be a very good birdie opportunity if you hit a good tee shot in the fairway. You will have an uphill second shot to a fair green.
Click on the image below to view a larger version.
The Tee Shot

The Approach
The Green

Hole #6
This downhill par 3 is short yet difficult. With a large grass bunker short and right of the green, and also traps on the left and entire back of the green, you must have a delicate touch to keep the ball on the putting surface.
Click on the image below to view a larger version.
The Tee Shot

The Green
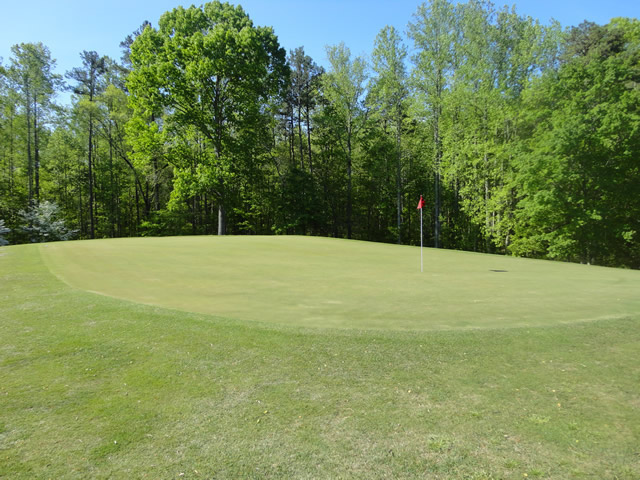
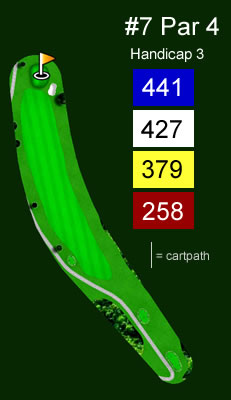
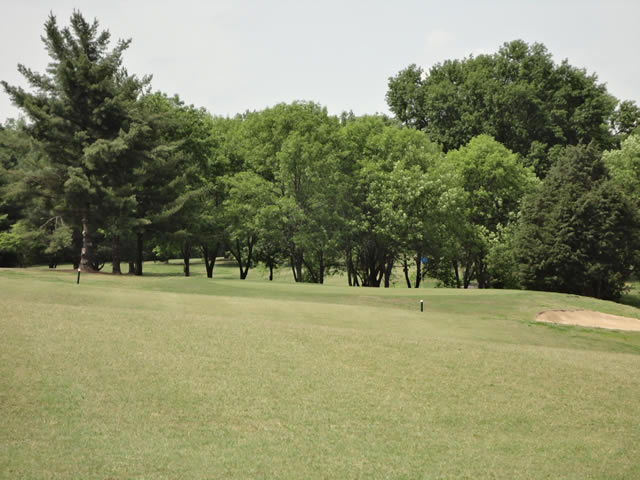
Hole #7
Our #2 handicap hole requires an accurate tee shot in order to reach the green on the approach. A par on this hole can feel like a birdie. Good luck!
Click on the image below to view a larger version.
The Tee Shot

The Approach
The Green
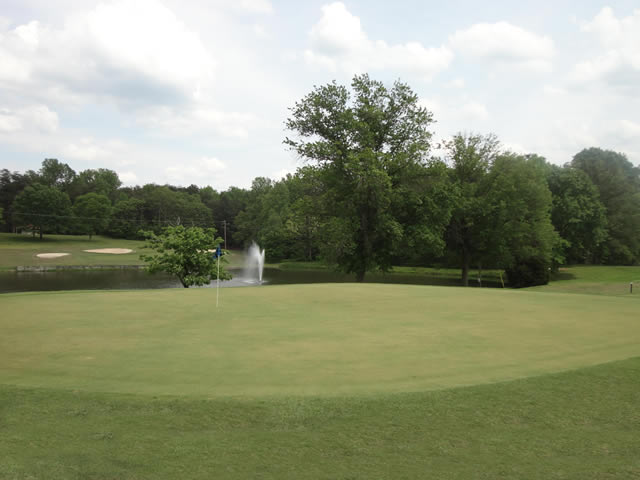
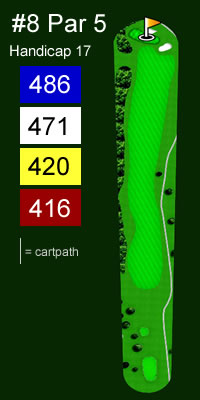
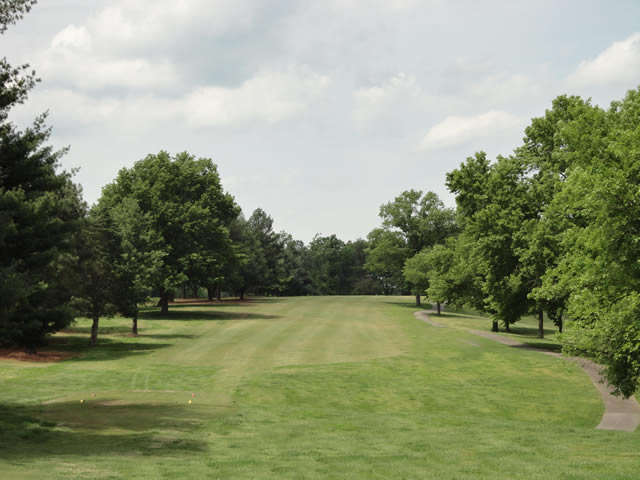
Hole #8
An uphill par 5 that is easily reachable in two with a good tee shot. The green is a very small peanut shaped landing area that is very difficult to hold the ball on. An uphill putt is ideal, and if you have a downhill putt you will need to have a confident read.
Click on the image below to view a larger version.
The Tee Shot
The Approach

The Green

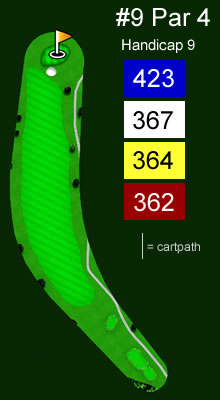
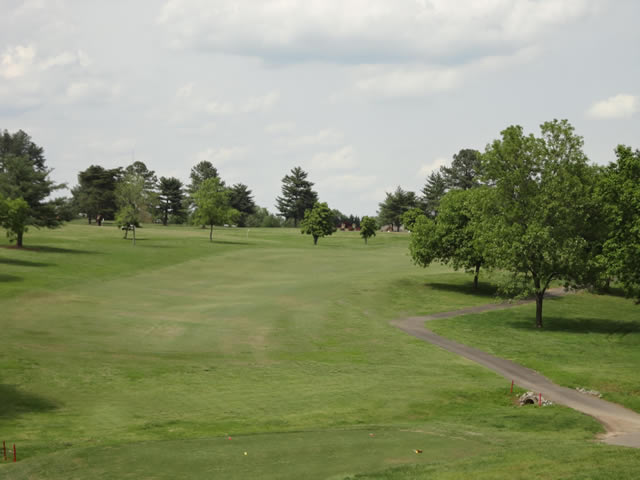
Hole #9
A slight dog leg right for the last hole on the front nine. A short par 4 that can be a birdie hole if you clear the very large bunker that looms in front center of the green. Trajectory will play a very important role with shot selection coming into the green.
Click on the image below to view a larger version.
The Tee Shot
The Approach
The Green
The Back 9
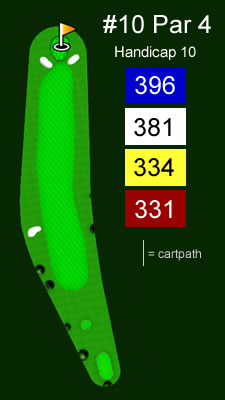
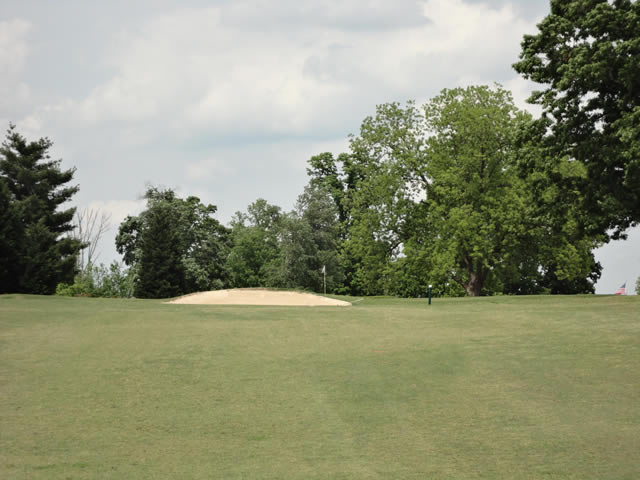
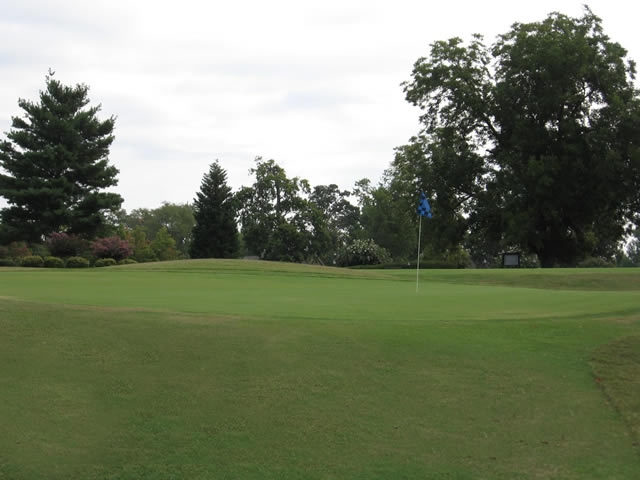
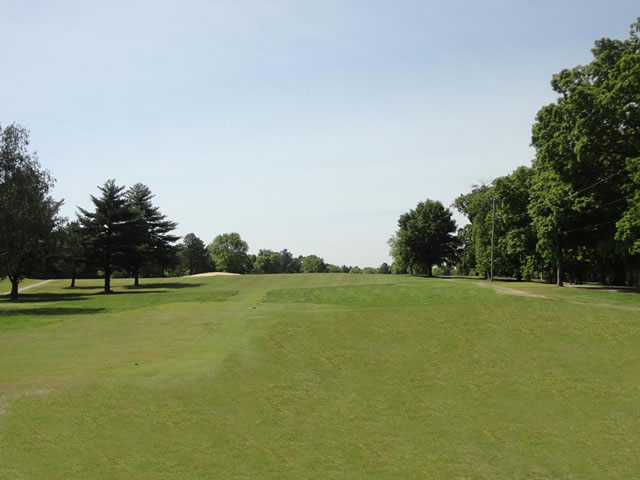
Hole #10
Starting the back nine this very easy par 4 will give you an opportunity to make a birdie or easy par. Avoid the sand traps to the front right and left of the large flat green.
Click on the image below to view a larger version.
The Tee Shot
The Approach
The Green
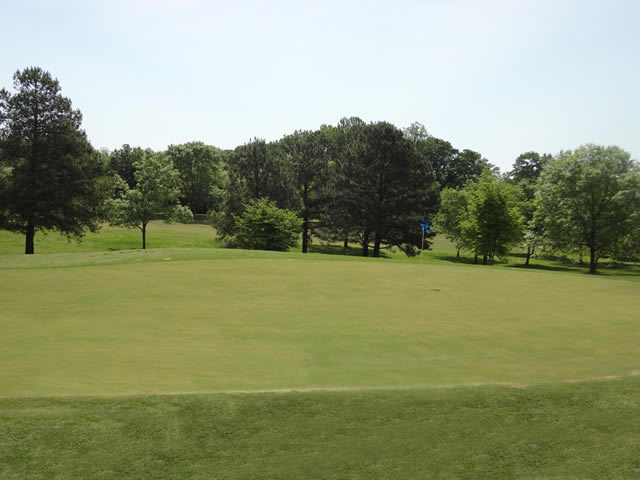
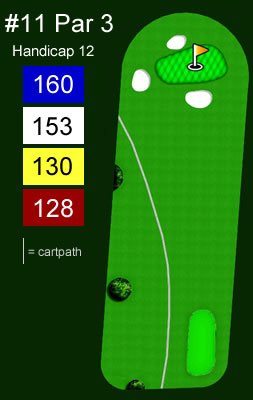
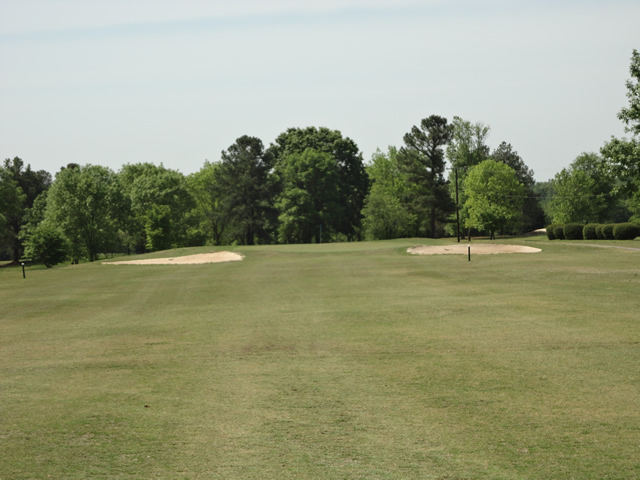
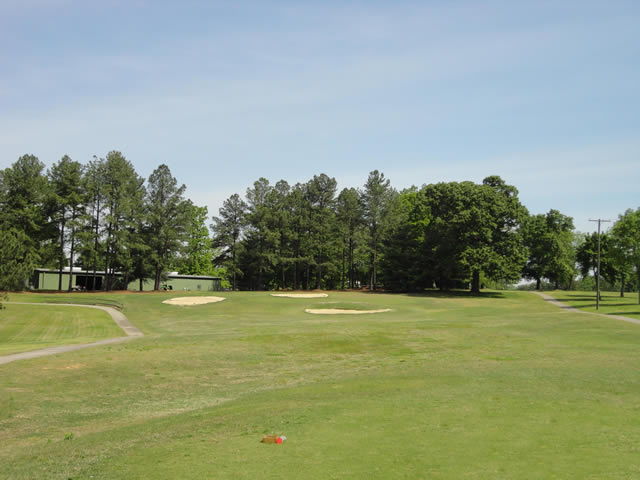
Hole #11
A short par 3 that is guarded by sand traps to the front, left and back. You will have to gently fly your ball on the green to have an opportunity at birdie. An easy yet challenging par 3.
Click on the image below to view a larger version.
The Tee Shot
The Green

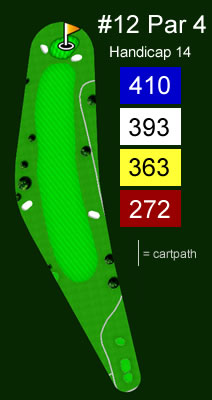
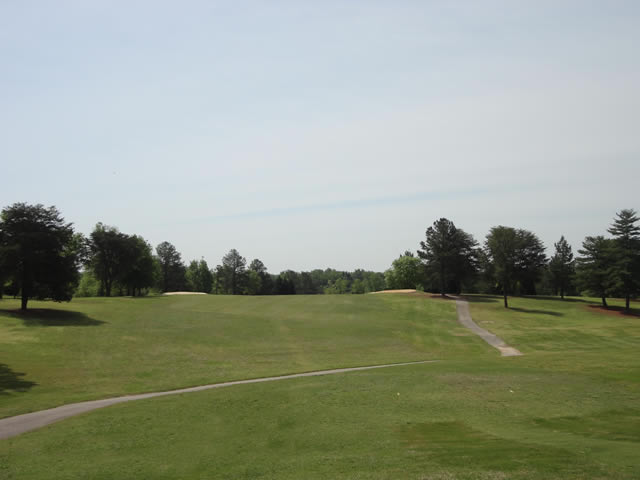
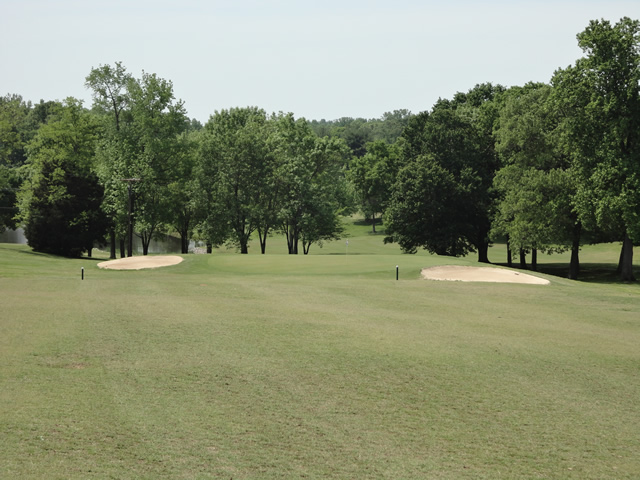
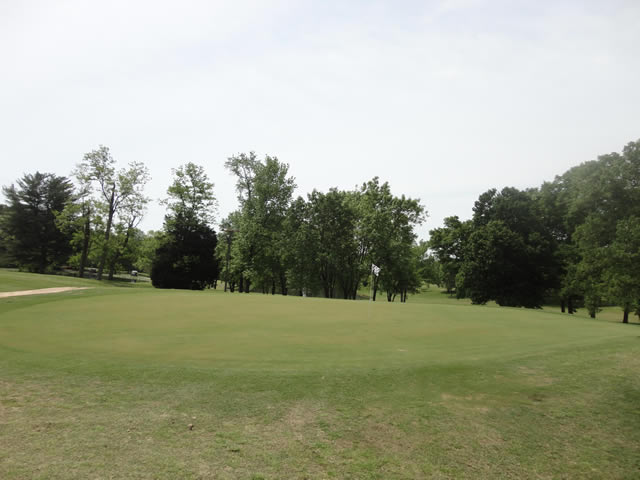
Hole #12
This hole can either be the easiest on the course, or the hardest. Your tee shot will be critical for a look at birdie on this short par 4. Don’t fly the green on your second shot or you will have a challenging chip coming back.
Click on the image below to view a larger version.
The Tee Shot
The Approach
The Green
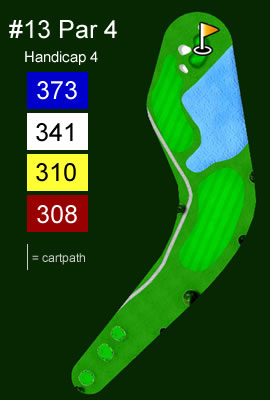
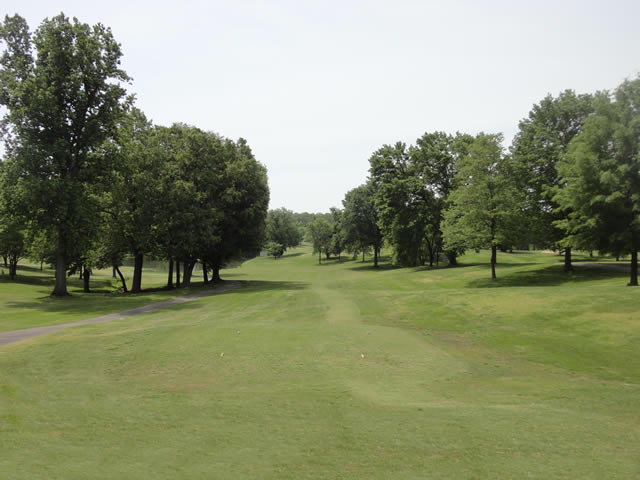
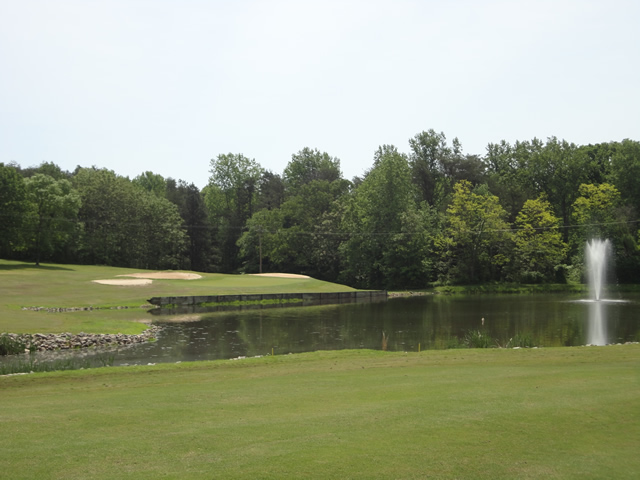
Hole #13
One of our more scenic holes on the course. You will have to lay up on your tee shot into this par 4. Your approach shot will be going over the water and into an angulated green that is long and narrow. Sand traps will surround the sides and back of the green.
Click on the image below to view a larger version.
The Tee Shot
The Approach
The Green

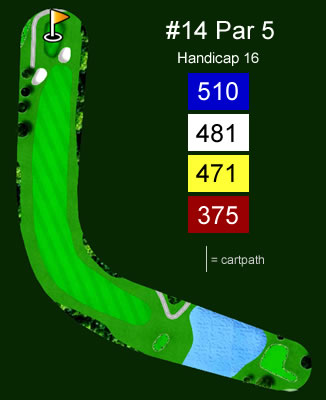
Hole #14
A par 5 that doglegs to the right. Your tee shot will be key to having an opportunity to reach the green in two. Sand traps will flank the front of the green and a water hazard will be in play to the right. Ball placement will be very important in determining your final score.
Click on the image below to view a larger version.
The Tee Shot

The Approach
The Green
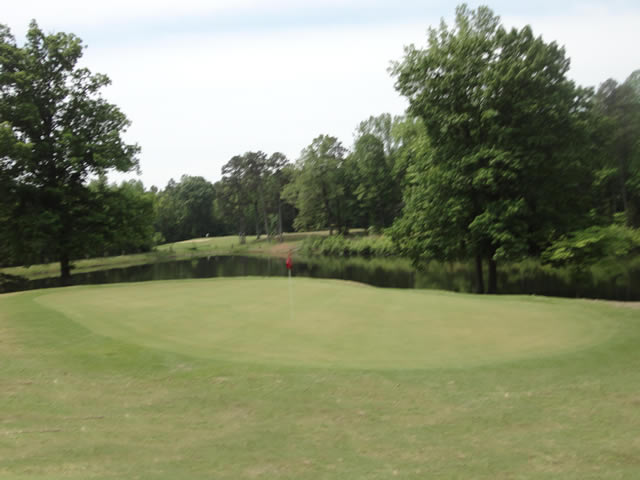
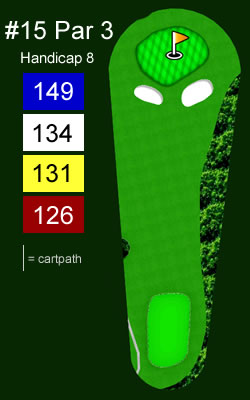
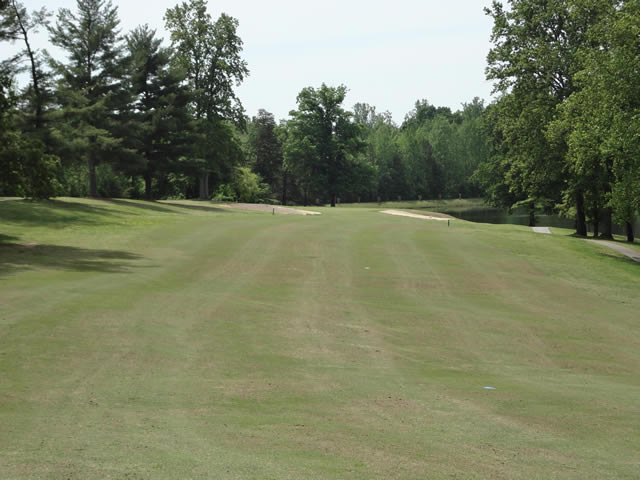
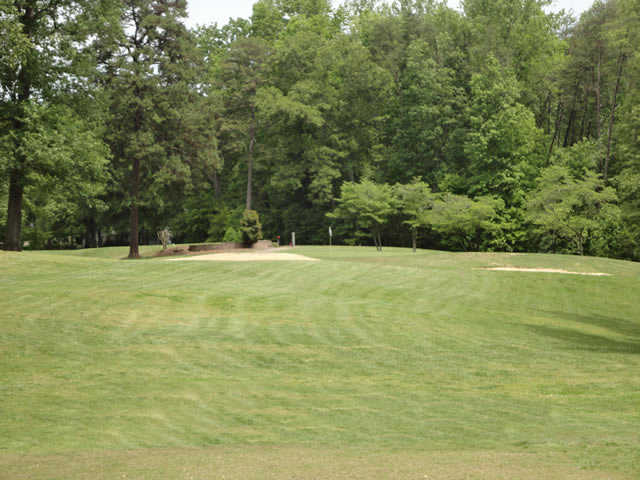
Hole #15
Our shortest par 3 on the course. Sand traps will be very present at the front right and left of the green. This is the hardest green to read and putt on the course. Pin placement can define your outcome.
Click on the image below to view a larger version.
The Tee Shot
The Green
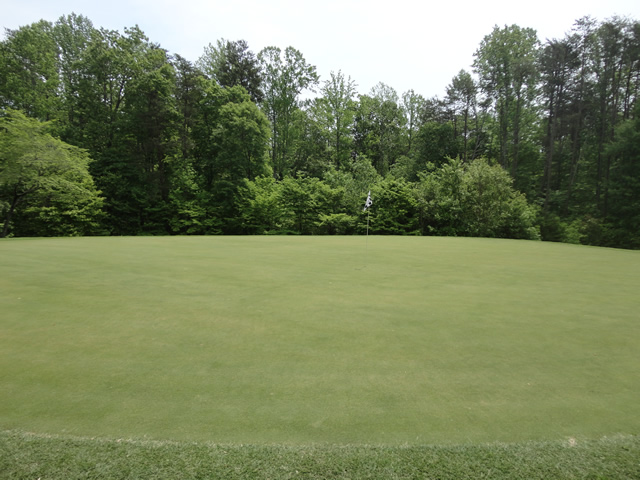
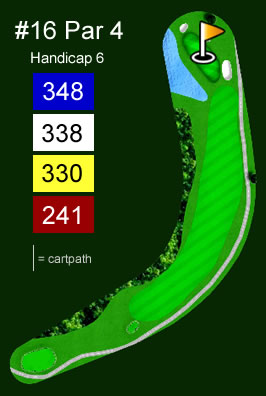
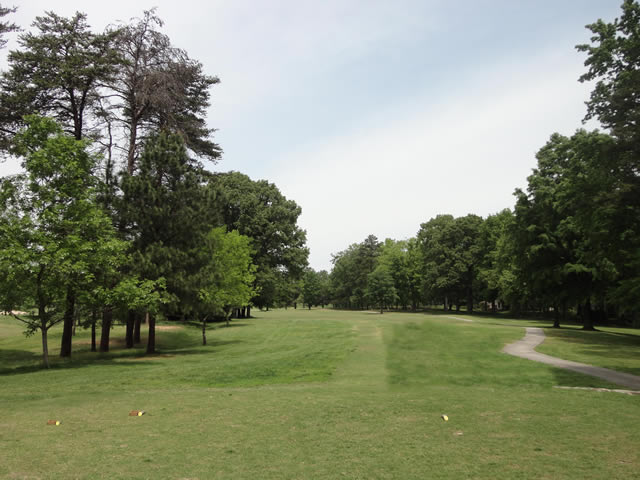
Hole #16
This par 4 that doglegs left is a very interesting hole. You can choose to have a risk or reward tee shot and cut the corner or play it safe down the middle. The green has sand traps at both sides and in the back. You will have to clear a water hazard in front of the green. By all accounts the best looking golf hole on the course once you reach the green.
Click on the image below to view a larger version.
The Tee Shot
The Approach
The Green
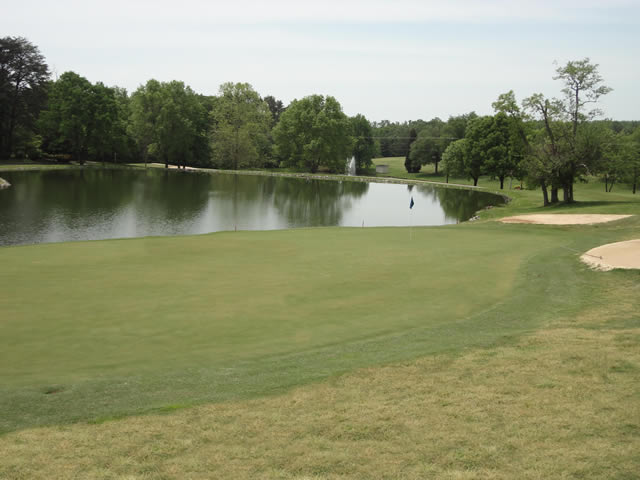
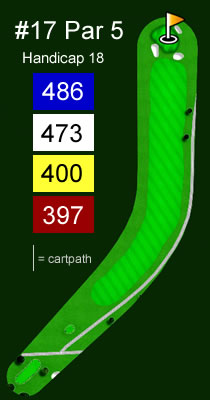
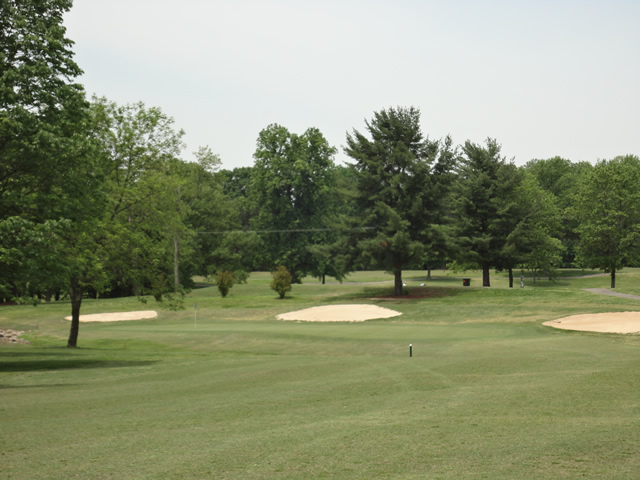
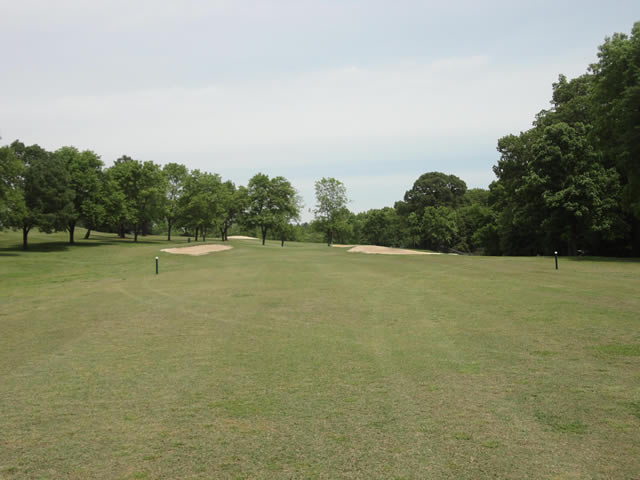
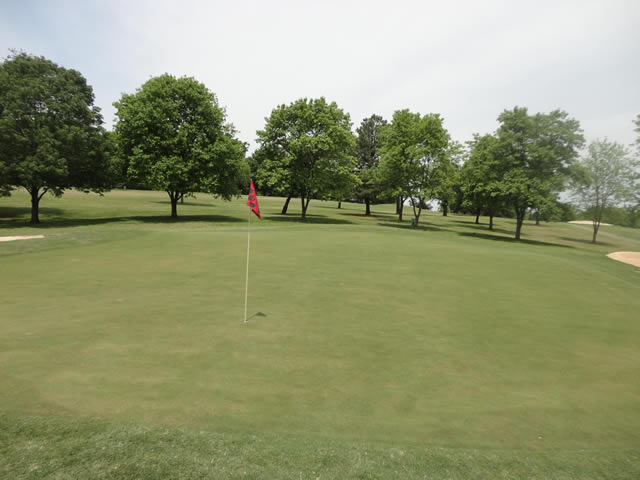
Hole #17
A par 5 that doglegs to the left. In the old days you could cut the corner for a risk or reward tee shot, but now that the trees have grown, playing it safe will be your best shot. With sand traps to the left and right of the green, you will have to thread the needle to this make or break par 5.
Click on the image below to view a larger version.
The Tee Shot

The Approach
The Green
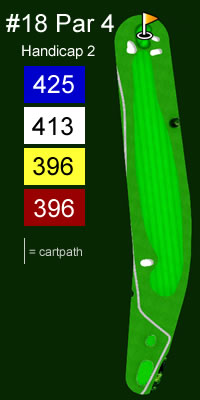
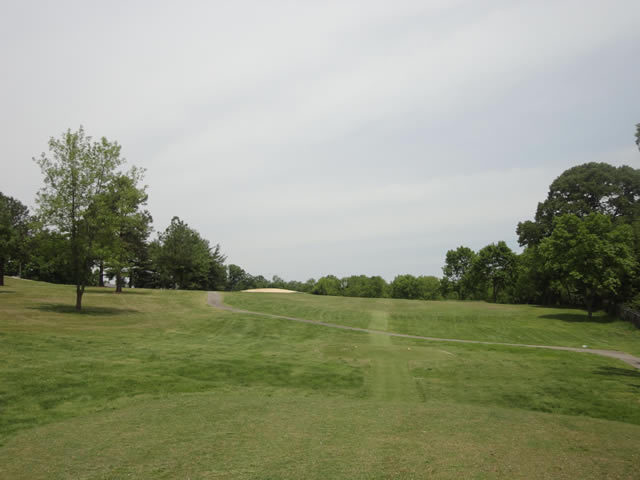
Hole #18
Our finishing hole is a par 4 that can be reached in two with a short iron. The green has sand traps to the front left and flanking the right side of the green. The green slopes from front to back and has two distinct levels. A par on this hole can be very rewarding.
Click on the image below to view a larger version.
The Tee Shot
The Approach

The Green