Latest News & Upcoming Events
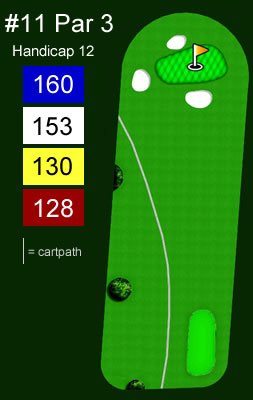
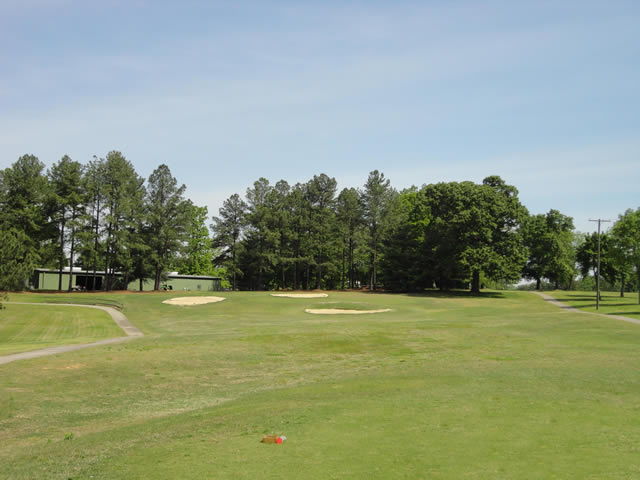
Hole #11
A short par 3 that is guarded by sand traps to the front, left and back. You will have to gently fly your ball on the green to have an opportunity at birdie. An easy yet challenging par 3.
Click on the image below to view a larger version.
The Tee Shot
The Green

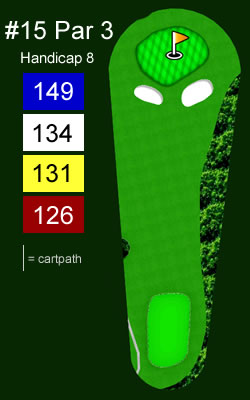
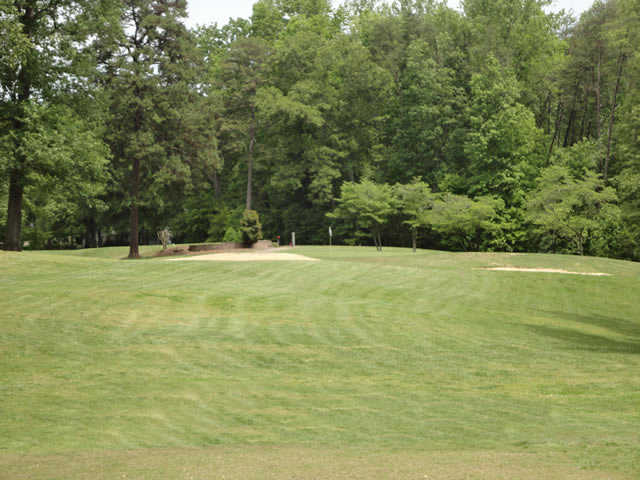
Hole #15
Our shortest par 3 on the course. Sand traps will be very present at the front right and left of the green. This is the hardest green to read and putt on the course. Pin placement can define your outcome.
Click on the image below to view a larger version.
The Tee Shot
The Green
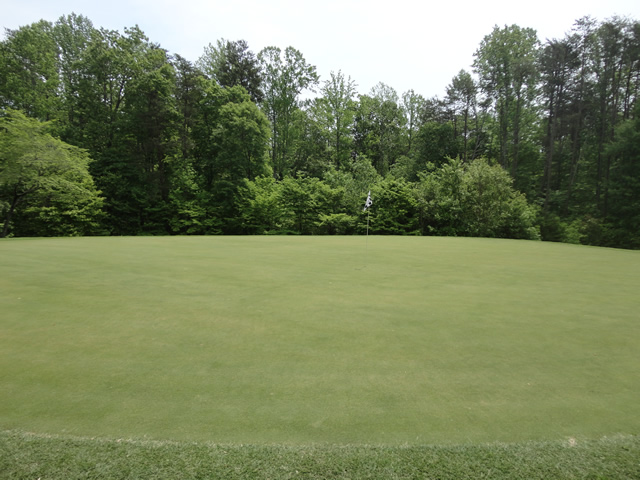
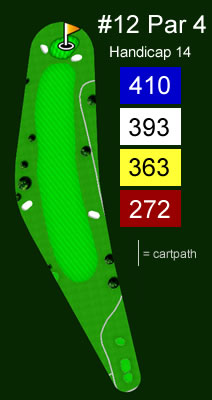
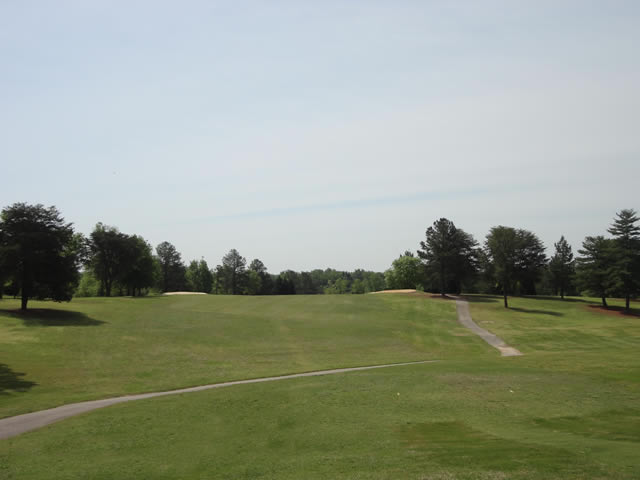
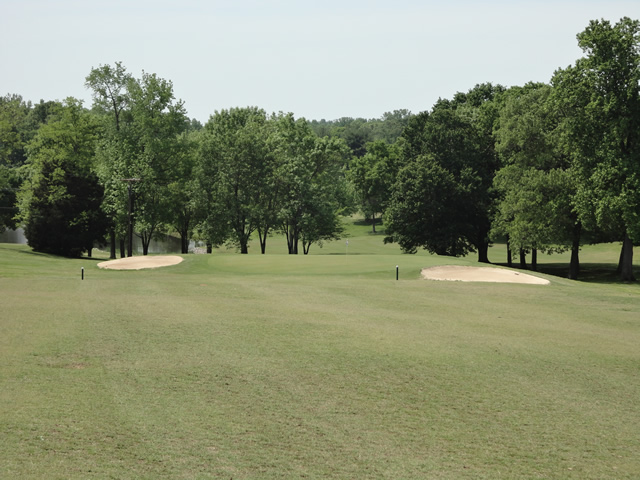
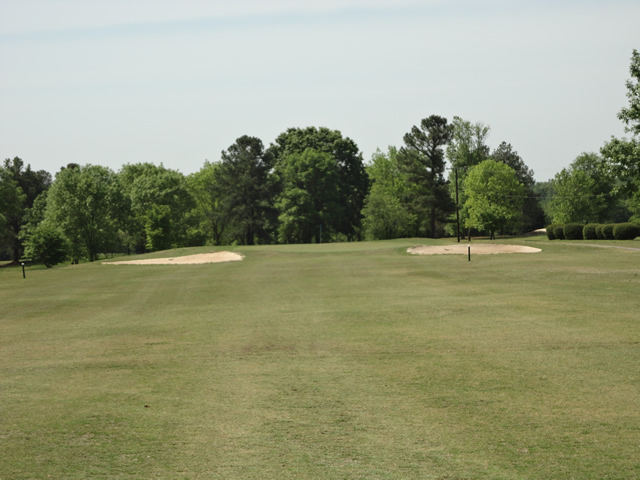
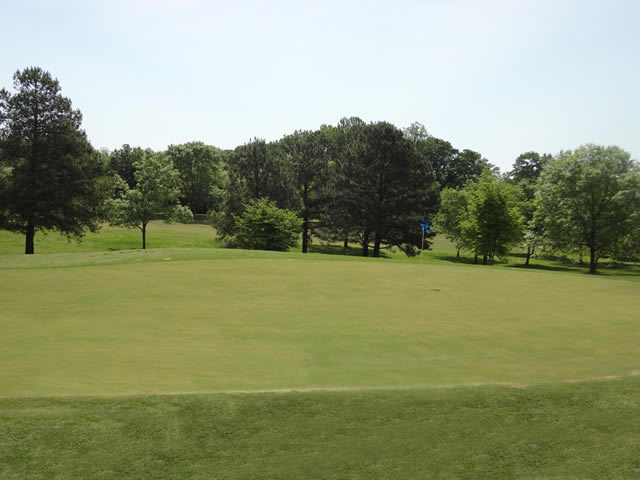
Hole #12
This hole can either be the easiest on the course, or the hardest. Your tee shot will be critical for a look at birdie on this short par 4. Don’t fly the green on your second shot or you will have a challenging chip coming back.
Click on the image below to view a larger version.
The Tee Shot
The Approach
The Green
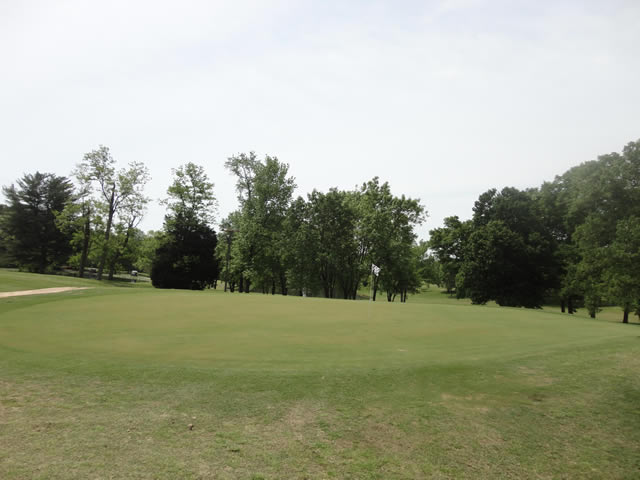
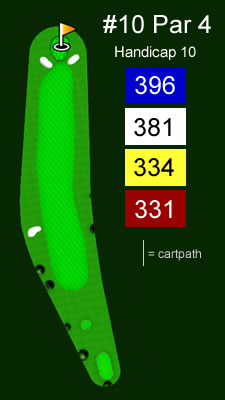
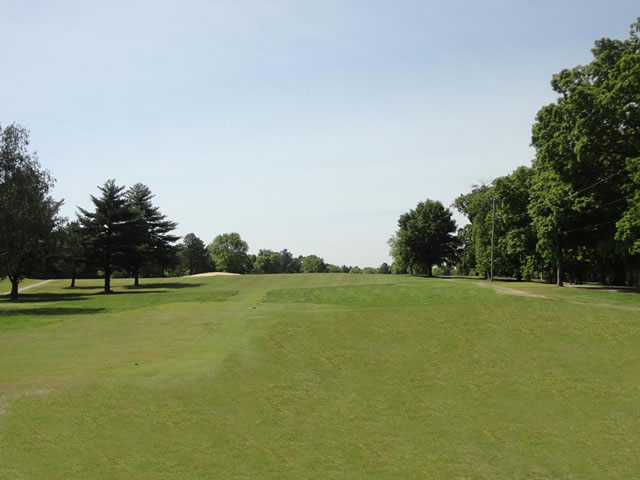
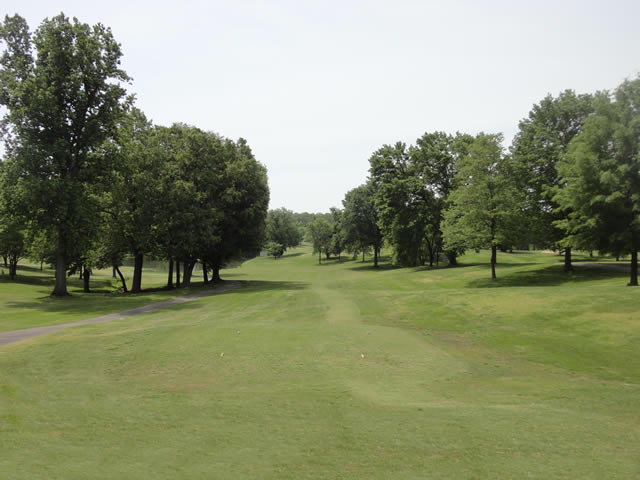
Hole #10
Starting the back nine this very easy par 4 will give you an opportunity to make a birdie or easy par. Avoid the sand traps to the front right and left of the large flat green.
Click on the image below to view a larger version.
The Tee Shot
The Approach
The Green
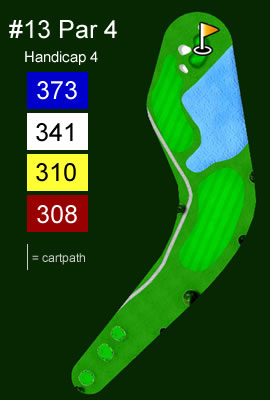
Hole #13
One of our more scenic holes on the course. You will have to lay up on your tee shot into this par 4. Your approach shot will be going over the water and into an angulated green that is long and narrow. Sand traps will surround the sides and back of the green.
Click on the image below to view a larger version.
The Tee Shot
The Approach
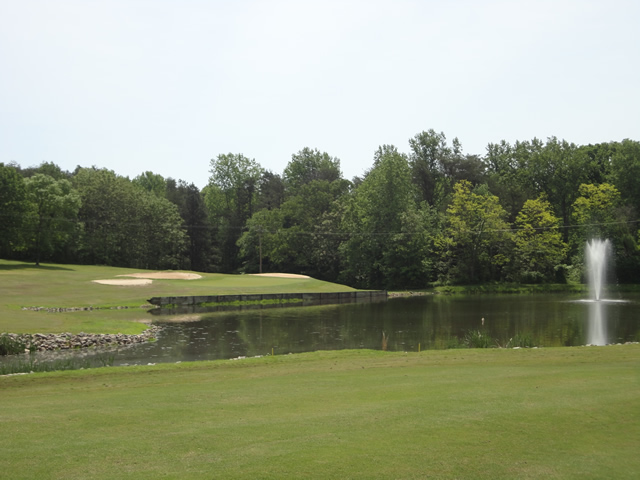
The Green

Page 1 of 2
- You are here:
-
Home

-
News & Events
-
Tour the Course
- Back 9